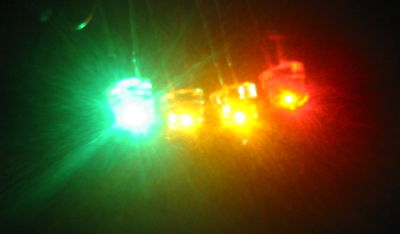
White LEDs are blue LEDs with a yellow phosphor that is excited by the blue light. The amount of yellow light emitted is adjusted to produce something that looks like white. You end up with mostly blue and some yellow. (Reference) This light reminded me of dawn for some reason. I apparently don't prefer that part of the day. Recent research strongly suggests that blue light is the portion of the spectrum that synchronizes the circadian rhythm in people. In general blue light tends to wake people up, even at surprisingly low levels. That is pretty much the last thing you want to have happen when you are on a late night bathroom mission. Thus we can assume that my bias had some level of backing from actual science. I decided that I might be happier if I had a light source without blue light that would still allow colours to be distinguished.
If one wants to use LEDs (and I totally did) you are left with some sort of mixture of light from single colour LEDs. People make white light by mixing red, green and blue LEDs. Since I wanted to get rid of the blue that left red and green. I knew enough about colour vision to know that the RGB thing is a bit bogus so I decided to throw in something in between. Yellow was the only colour left over in my LED assortment so I ended up with a RYG mixture. The first combination I tried worked well enough:
My extensive research on the light source now complete I turned my attention to the efficiency issue. The root of the problem is that all illuminated surfaces have to be below the level of the edges of the pot shade. The LEDs have to be below the top edge of whatever is shading the wall. The top edge of whatever is shading the wall can not be higher than the edge of the pot. The pipe cap shade used in the second generation light needed to be fairly tall because of the curved position of the LEDS. This put the LEDs fairly low in the pot shade. This caused the LEDs to spend much of their light illuminating the blackened interior of the pot shade.
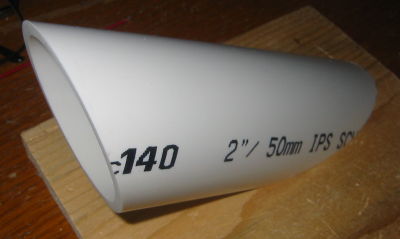
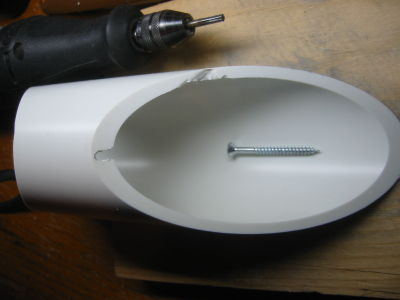
Here I hit a bit of a creative crisis. Up this point I had been exclusively using plastic pipe end caps to build my lights. The problem is that they do not have many straight edges. So I ended up betraying my medium with the use of aluminium sheet as a wall shade. Here is the actual drawing I used to visualize the angles:

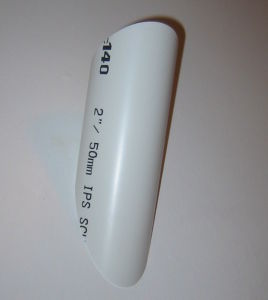
This is a side view of the flat top LED and some 1/16 inch (1.6mm) aluminium sheet bent at a 90 degree angle. This gives a shadow with an edge that extends up at around 60 degrees. For the pot shade I used some 2 inch (50mm) water supply pipe thereby extending my run of misusing plumbing supplies. Here are some pictures that pretty much show what I did next:


A few notes on the proceeding pictures:
- Hanging the pot shade from a single screw is not very secure.
- I messed up on the bending. I cheated and just trimmed the corners of the wall shade based on my knowledge of the size of the room.
- I tried to polish the aluminium. It helped a bit but was probably not worth the bother.
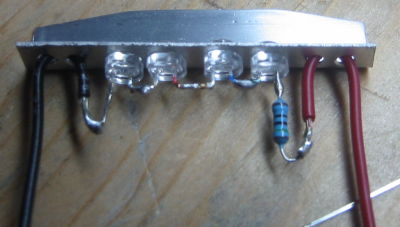
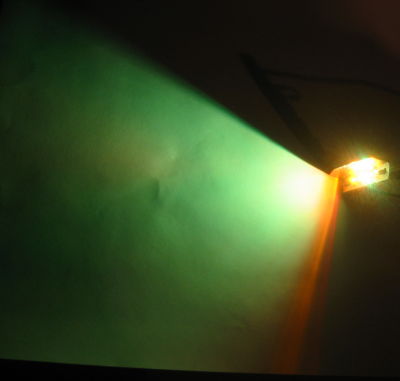
- The resistor value is 150 Ohms. With a 12V supply this works out to about 15mA which means that the light consumes about 0.2W.
- The light mixture is nothing like the colour shown in the shade test picture.
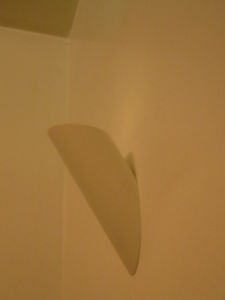
There is what the light looks like on the wall. Rumour has it that there are solvents that can be used to remove the text from the pipe. I seem to have some sort of function over form thing going on right now so I'll probably leave the text.
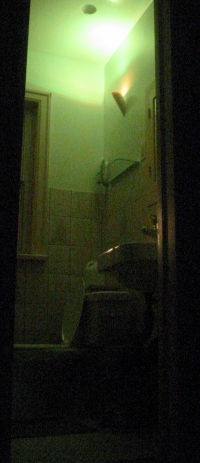
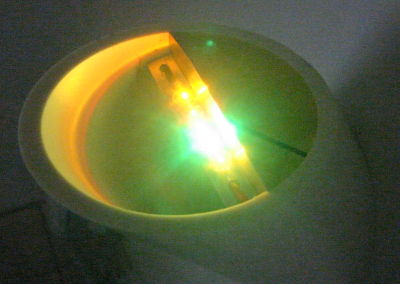
This is what my bathroom looks like at night. I adjusted the angle of the wall shade once everything was in place. The yellow fan of light on the wall behind the light could be eliminated by blackening the inside of the pot shade. I will probably not bother as it is fairly dim. It is yellow because the yellow LEDs are outermost so they are closest to the inside of the pot shade. Again, the weird colour shown here is not realistic. The light is actually a different weird colour.
So far I am happy with the results. The light is not entirely mixed when it hits the ceiling and so looks a little yellow/green blotchy on the ceiling. I noticed that for approximately a day. I suppose the inhabitants of other planets might associate things with the colour of the light but I do not get out that much so I really do not notice it now. It does seem brighter than the last light. It is using twice the power so that fact does not prove much of anything about the design.
The question of what this all means will be addressed in a future episode...
posted at: 15:24 | path: /ledlight | permanent link to this entry